The following unit composition compilation, derived from a discussion held in the official First Strike forums, was made to give you ideas on how to set up your squads for various tasks in First Strike matches. As it is based on a forum thread, further fireteam/squad ideas submitted to the forum thread should be transferred here, and the other way around.
Important: When reading the article, note that with the exception of fireteams that require more than one officer to get up and running, 'Composition' refers to only the members other than the squad leader (officer), who is considered to be a 'given' part of any squad. So for example, the 4-man sniper fireteam consists of two snipers, a medic, and an officer, even though the latter is not listed.
It should also be mentioned that the suggested composition of each unit described here are just that - suggestions. The mortar fireteam, for example, calls for three heavy weapons specialists with mortars in addition to a Support player to provide ammunition. However, you may find in-game that a different setup entirely works just as well in your situation. Feel free to experiment, adjusting squad composition as called for by the combat situation.
Offensive[]
Units intended for offensives and reconnaissance.
8-man General Purpose Platoon (two squads)[]
Composition, first squad:
- 1 Officer, who'll be in charge of both squads
- 1 Medic
- 1 Trooper with Blaster Rifle
- 1 Support
Composition, second squad:
- 1 Marksman/Sniper, who'll lead the second squad, taking orders from the Officer
- 1 Medic
- 1 Heavy Weapon Specialist with rocket launcher
- 1 Heavy Weapon Specialist with repeating blaster
Suggested use: Situations where a big force is needed in one place, such as when besieging the last enemy control point.
This is a large all-purpose unit consisting of two four-man squads. Since VOIP is not possible between squads, the members will need to communicate via Ventrilo, TeamSpeak or a similar third-party communication system.
4-man Mechanized Anti-Tank Fireteam[]
Composition:
- 1 Support
- 1 or more Heavy Weapons Specialists with rocket launchers
- The Alliance Combat Speeder
Suggested Use: Mos Espa, hunting AT-ST walkers.
A hit-and-fade unit designed to get within firing range quickly, deliver an attack, and swiftly retreat. Its specialty is boosting into range of a walker, for then to have the HWSs fire a rocket each. The Officer or Support player should man the laser and suppress any infantry. Keep in mind the firing arcs of your crew - the laser can fire in any direction, but the two passengers are confined to firing only to the left and right of the vehicle. Rotating your craft so that one rocket launcher can fire while the other reloads may be a good idea if you're not under heavy fire. Once the rockets are away, retreat to a safe spot where the Support player dismounts and administers repairs to the speeder.
Once the repairs are finished, the process is repeated unless the walker has retreated to a safe distance. Even if the walker has infantry escort, this approach just might prove deadly.
The Officer provides Bacta tanks, and the role of the fireteam is not to fight, but rather to avoid infantry, but the crew of the vehicle is very exposed to enemy fire, and crew losses are far more common than the loss of the speeder itself, so you may want to substitute the Support player or a Heavy Weapons Specialist with a Medic.
4-man Hit-and Run Bike-miner Fireteam[]
Composition:
- 2 Support, both with EMP weapons, or 1 Support with EMP weapon and one HWS with rocket launcher
- 1 Medic with long-range weapon
Suggested use: Strike at Endor, distracting enemy units.
If you've got canny bike pilots and/or open ground, this fireteam can screw over enemy advances. Get two speeder bikes; have the Officer pilot one, the Medic pilot the other and both support guys riding shotgun, with 10-sec bombs or proxy mines at the ready. Find a secure spot to place your spawn beacon and generators, then make an attack run on an enemy position or where men are moving. With the bike's guns firing, the support men drop their full load of bombs or antipersonnel mines, close to where infantry or stationary defensive positions are. Should there be enemy vehicles, subject them to the EMP blasts at range, then drop the bombs at their feet. Even if the attack run doesn't kill anyone, at least it'll force the enemy to scatter. After the attack run, surviving bikes retreat to their secure spot and perform repairs, medical care, and weapon reloading.
An alternate configuration of the squad uses one Support and one HWS at shotgun instead of two support. The HWS drops his anti-tank mines, while the Support drops his proxy mines.
2-man Bike Patrol Team[]
Composition:
- 1 Trooper to drive bike.
- 1 Speeder Bike.
Suggested use: Patrolling the perimeter of a Mos Espa control point, giving advance warning to your squad of enemy attack.
This simple reconnaissance and patrol unit is centered on the usefulness of the Officer's sensor ping device and the survivability of the swift Speeder Bike. Have one of your squad members drive the bike while you ride shotgun, periodically pinging your surroundings. You may want to choose a Trooper for the task of driving the bike, since they are issued homing beacons, which can be attached one at a time to your bike to further help you spot enemies. Move carefully, keeping in mind that your bike's engine can be heard from quite a distance, and any enemies in the area should be caught by your scans long before they notice you, and even if you are spotted, the agility of the bike means you should be able to retreat before you are destroyed.
If your squad is guarding a control point, patrolling the area in this manner means you should spot attackers before they make contact with the control point's defenders, and if you are advancing, it lets you know which path is safe, and allows you to deploy spawn beacons and supplies for your squad members to make use of.
6-man Combat Vehicle-Augmented Assault Squad[]
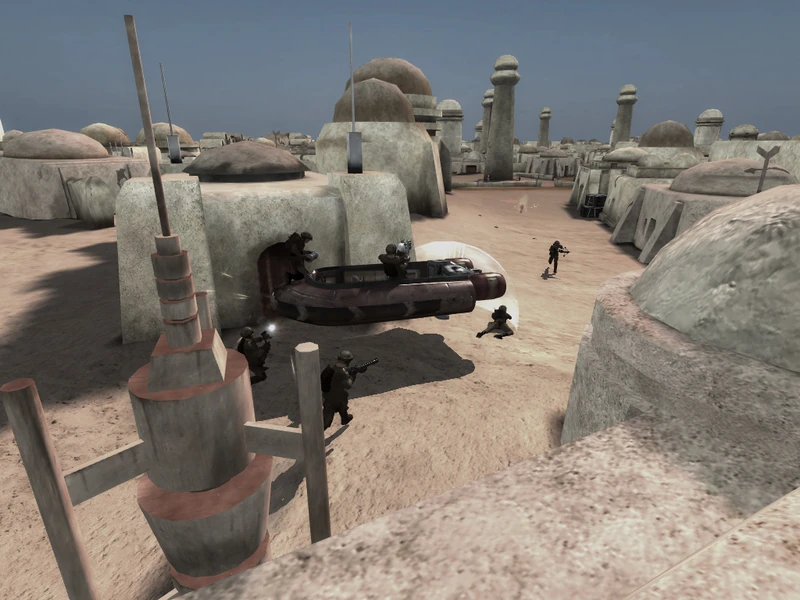
A six-man Combat Speeder team near Jabba's City House on Mos Espa, with the various squad members each assigned one or more tasks such as vehicle repair, placing of a Portable Shield Generator, etc.
Composition:
- 1 Support with DEMP
- 1 Heavy Weapons Specialist with a rocket launcher
- 2 Troopers, one with a blaster rifle and one with a sniper rifle
- 1 Medic with a carbine
- 1 Attack Vehicle, such as the AT-ST or S-1 Firehawke, or a Transport, such as the Combat Speeder or Freerunner.
Suggested use: Any map with tanks or AT-STs.
On maps where vehicular combat is key to victory, this squad can do a lot to both augment a vehicle's strengths and cover its weaknesses, allowing both it and the squad accompanying it to do major damage or gain a lot of ground.
The Officer and Trooper w/ Rifle pilot and ride shotgun respectively, while the rest of the squad follows on foot or in a transport. The trooper deploys his sensor droid and attaches his first homing beacon to the vehicle, replacing it when it runs out of energy. If needed, the Officer can get out to deploy a blaster, spawn beacon, or area scan while the co-pilot maintains fire. The Support guy hangs close behind cover of his squad mates and repairs the vehicle as needed, also deploying his astromech droid to offer assistance. Medic, Trooper, and HWS keep an eye out for appropriate targets for their weapons and emphasize defending the vehicle or giving it an advantage against other vehicles.
HWS and Support can help here with their EMP weapons, shutting down enemy vehicles or defenses for the Rockets or combat vehicle to destroy. HWS can also deploy his shield in a defensive scenario with the squad, affording his squad mates greater protection from the enemy.
5-4-Man Storm Unit[]
Composition:
- 2-3 Troopers
- 1 Medic
- 1 Support
Suggested use: Tatooine Mos Espa
This team is designed to storm bases with lots of obstacles by the use of the equipment and weapons available to the Trooper, partuclarly the smoke grenade, which give cover as you advance and confuses the enemy, making their movement harder.
Defensive[]
Units intended to hold an area or provide fire support.
3-man Turbolaser Fireteam[]
Composition:
- 1 Support or Medic (see last paragraph)
- 1 Heavy Weapons Specialist
Suggested use:
- On Mos Espa, overlooking the open space between the city and the hills shielding the Imperial staging area.
- Holding choke points such as hallways, alleys, and gateways.
A fireteam centered around the deployable turbolaser, meant to be set up in the close vincinity of at least one other squad. The buildup consists of the bare minimum to deploy and operate a turbolaser effectively: An Officer to deploy the weapon, a Support class to provide the generator and keep repairing the weapon, and a Heavy Weapons Specialist to deploy a protective shield covering all but the barrel of the turbolaser, allowing it to fire without risking damage to its gunner.
Since this is inherently a support fireteam which should work with other friendlies close by, it doesn't need more than the bare minimum of three people. To take out this fireteam, you'll need to flank it, attack it up close with poison or sonic grenades, or overrun it with a speeder or a similar rapid vehicle.
6-man Heavy Blaster Rifle Fireteam[]
Composition:
- 2-3 Heavy Weapons Specialists with heavy blasters, job is to make bubbles and keep fire going
- 1 Medic
- 1 Support
Suggested use: In situations where heavy anti-infantry or anti-aircraft fire is required.
The big brother of the 3-man turbolaser fireteam, this unit is designed to lay down heavy suppressing fire on enemy infantry. Deployment consists of the Officer deploying a turret, the Support player providing it ammo, and the Heavy Weapons Specialists deploying their shields. The turbolaser and heavy blasters then lay down fire on the enemy, while the Medic watches the rear for ambushes and heals troops who get wounded. To further deter ambushes, the Officer can use his sensor ping ability to pick up approaching hostiles. The Support is there mainly to power the turbolaser, but should also be able to assist in defending the firebase.
This fireteam should also be fairly effective against aircraft, as none of them carry weapons able to penetrate the shield. Leave the shield to fire on aircraft, and duck back below it if your target makes an attack run on your position.
6-man Foxhole Platoon (two squads)[]

A foxhole fireteam in downtown Mos Espa, with two gunners manning the deployed turbo lasers and the rest of the squad providing perimeter defense.
Composition:
- 2 Officers
- 2 Support, 1 per squad, both With EMP weapons
- 2 Heavy Weapons Specialists, one with Rockets, one with Mortar
Suggested use: Any site in need of strong defense.
This defensive setup is intended for open battlefields, such as the Mos Espa plains between the city and the outer edges of the map, where threats are possible from any direction and from the air. The tactic is also effective at street intersections, such as the southern part of the Palace Ruins in Mos Espa.
It consists of two squads acting in tandem to improve survival chances and create additional firepower in the form of two deployable turbo lasers and two or more overlapping shields. Both heavy weapons specialists deploy their shields back to back, overlapping, creating a 360° shielded bunker. Each officer then deploys a turbo laser partly inside each side of the shield, as well as bacta canisters to keep the gunners alive, while a support player deploy his generator to power the turbo lasers, for then to man the heavy guns.
The shield holds off blaster fire, and in open spaces, the fireteam is often far enough away from enemy troops to prevent poison grenades from being effectively used. Enemy troops behind cover can be hit by the HWS' Mortar and rockets. Should an enemy vehicle get too close, they can be hit with double EMP, then with rockets and the turbo lasers themselves.
When this squad setup was tried in Mos Espa, the squad members not manning the guns spread out to keep the enemy from getting in range to overrun the MKII's. Although the firebase was still destroyed several times throughout the battle, making the MKII's the CP's second, not first, line of defense still worked to great effect - anyone who made it through the infantry were easy pickings for the more valuable MKII's.
3-man Sniper Fireteam[]
Composition:
- 2 Troopers, both with Sniper weapons
- 1 Medic with short range weapon
Suggested use: Infantry suppression in an open, infantry-only locale.
Fortify a position quickly and maintain area scans, and the sniper team can spell doom or immobilization for any enemy infantry. As this is a four man unit, the officer can use all his special abilities, including the ever-vital spawn beacon. Expect your troopers to get shot at and wounded a lot; that's why you have the medic and spawn beacon. Expect enemies to try and flank you, that's why you have homing beacons, sensor droids, and area scans. Expect your troopers to run low on ammo; thank Heaven the officer's got an ammo box. Set up this position on a small ridge or at a choke point, and no enemy soldier will get close. Oh... and are you doing this on a map with vehicles? Be careful or find some REALLY good cover nearby.
4-man Mortar Fireteam[]

A four-man Alliance mortar fireteam under fire in the palace ruins control point in downtown Mos Espa.
Composition:
- 3 Heavy Weapon Specialists with mortars
- 1-2 additional men for reviving the dead, protection against armour, spotting, etc. (optional)
Suggested use: Any situation in which the enemy is holed up somewhere and proving hard to drive out, such as the stalemate that often arises when the Imperials fortify themselves in their outpost on Endor.
Want to keep enemy infantry in one place? Use the power of triple shield generators and mortars. Set up the shields so that you have a small gap to side-step and fire from. Deploy a spawn beacon, ammo box, bacta, land mines and whatever else you have handy, then start raining down the mortars. Ideally, one soldier should fire his clip, then the next should start firing right before the first finishes the clip and reloads, with a focus on maintaining a constant bombardment. If the mortar unit is close enough to the enemy, an alternative way to set up the shields is the dome shape, which lets the mortar men lie inside and fire through the 'hole' in the top of the dome. The Officer or Support unit can act as a forward observer, keeping an eye on where the mortars are landing and communicating with the mortars so that correcting fire can be carried out and enemy troops are unable to move around.
If employed when the enemy is reduced to his last control point, this fireteam makes things Hell for them. As part of a two-group assault, this fireteam forces the enemy to take cover and gives the frontline an edge... just make sure you're not fragging your own men! Also, the enemy will definitely want to counterattack to bring an end to your bombardment if it proves effective, so make sure to be out of reach, or, failing that, have friendlies near you for protection. If there's no one to defend you, stay mobile to keep the enemy from reaching you. Bringing along a Trooper for protection is a good way to add some security, should you find yourself in danger of close combat. And if you're doing this on a map with vehicles, remember that the HWS class has antitank mines.
5-6 man Armor Buster Fireteam[]
Composition:
- 3 Heavy Weapon Specialists with AV torpedo launchers
- 1 Support with an DEMP weapon
- 1 Officer
- 1 Medic with a Carbine (Optional)
- Additional HWS with torpedo launcher optional
Suggested use: Any situation where an enemy armored unit is wreaking havoc and needs to be put down without friendly vehicle support.
Imperial AT-ST causing trouble at home? Rebel T1-B rocketing your fellow stormtroopers to kingdom come? This squad can put down the threat in short order, and even after the vehicles are no longer a threat, still be a viable infantry fighting unit thanks to the fairly effective pistols in the game, as well as the Officer's deployable laser cannon. Here's the procedure: Sneak your fire team to an obtuse angle relative to the vehicle's fire zone (to the sides is best, since the front will be where the hell is going down and the back is where their infantry will be). When the time is right, have your support guy pop up and EMP the enemy unit (if he's close, have the HWS guys throw their electrostatic grenades and help out). When the enemy is helpless, the HWS guys pop up and hit the enemy with the wrath of a few torpedoes. While a single torpedo shot only knocks off about 10-15% of a vehicle's health, several shots in tandem will cut the vehicle's health in a hurry.
If the squad's position is compromised, have the heavy soldiers drop their shield generators and create a bunkered position. Torpedo and EMP the enemy until they're knocked out. If the crew bails out to repair or escape their compromised machine, pick off the crew and try to steal the vehicle as a squad (but remember that certain vehicles, such as tanks, cannot be stolen)! Even if another enemy close by comes in and takes the vehicle, your squad mates still have some torpedoes ready to pump into it and finish it. And if you DO manage to steal the unit, have support dude repair it, and watch as the tide turns for your team.