| Escape from Hoth | |
| |
| Map Information | |
| Factions | Rebel Alliance VS. Galactic Empire |
| Type | Objective Map |
| Size | 16, 32, 64 |
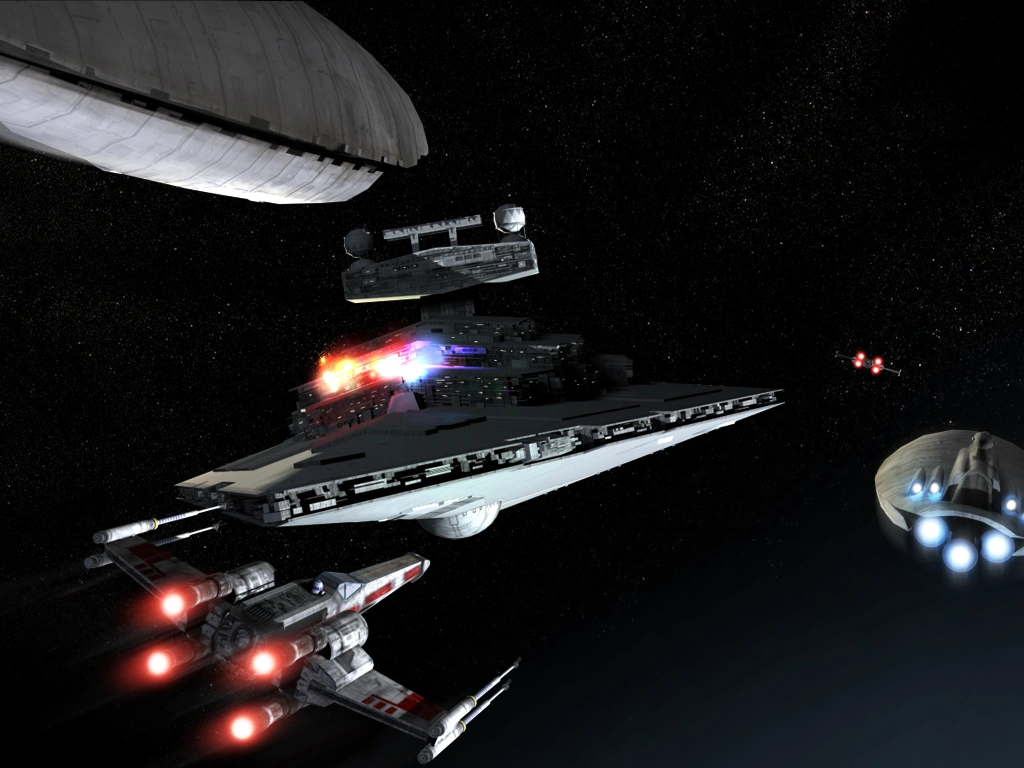
| Briefing | "After the Battle of Hoth, and the subsequent evacuation of the Rebel Alliance stronghold, Echo Base, the last group of Rebel Gallofree Transports heads for space. Unfortunately the Imperial Star Destroyer Vindicator lies in their path, between them and clear space free of Hoth’s gravity well that will allow them to make the jump to hyperspace. Luckily the base’s Ion Cannon crew set the weapon to auto fire at any enemy vessels that close into range. The resulting blast has temporarily crippled the mighty Imperial war cruiser. However the Transports and their escort wing of Rebel Starfighters must still deal with the crippled ship’s compliment of TIE Fighters and Bombers before they can make good their escape." |
| [Source] | |
Escape from Hoth is a space map where the objective is to transport 50% of the Rebel transports out of harm's way - the tricky thing is, the hyperspace jump is next to the Imperial Star Destroyer.
| Alliance Vehicles | Imperial Vehicles |
|---|---|
| GR75 Gallofree Medium Transports (mission critical) |
Star Destroyer (immobilized) |
| CR90 Corellian Corvette (64p only) | Lancer-class Frigate (64p only) |
| T-65 X-Wing Starfighters | TIE Fighters |
| BTL Y-Wing Starfighters | TIE Bombers (proton bombs) |
| Classes: Pilot. | |
| [Source] | |
Suggested Strategy[]
Rebel Strategy[]

Escape from Hoth is a quite challenging objective space battle map for the rebels.
The Imperial star destroyer has a number of automated high-caliber cannons and turrets scattered about its surface. On both of the ISDs sides, below the bridge structure, there are 4 high-caliber cannons that look like large rotating discs that will automatically blast any Gallofree transport that gets within their range. It is therefore absolutely imperative for the rebels to send out Y-wings and X-wings to take out these cannons before the Gallofrees get too close to them.
The less-powerful turbolaser cannons on the ISD are close enough to the escape beacon to destroy any Gallofree before it can make its jump to hyperspace. The rebels need to make sure that any such cannons in the path of the Gallofrees are destroyed when a transport nears their range; this can be done by either the laser-cannons of a starfighter, or the guns on the Gallofree transport. Keep an eye on them, as they do respawn, although their respawn rate is quite slow.
A transport is brought into hyperspace by maneuvering it within 100 meters of the rebel beacon on the map. You should always see a rebel icon in space denoting this beacon. If you don't, hit the left ALT key to turn it on. The beacon is an actual 3D buoy which you can collide with, so be careful near it.
There are two obvious strategies for bringing the Gallofrees safely to the hyperspace point. The first relies on escort, cooperation and brute force and the second relies on stealth. The first is to simply coordinate with the team to get an escort for your transport. Preferably synchronize your approach with other transports, thus forcing the imperials to divide their firepower between multiple critical targets. Even if the Imperials are smart enough to concentrate their fire on one transport and thus manage to bring it down, the other transports in the group will have made it most of the way to the beacon without taking too much damage.
The second, stealthy, strategy can be employed by a lone pilot. Simply get into a Gallofree and ride it somewhere toward either side edge, top or bottom of the map, while generally moving in the beacon's direction. Stay close to the edges of the map, well out of the way of the main imperial forces, while moving in the general direction of the ISD, and do not turn to face the beacon directly until you are more or less as close to it as you can get without turning. With luck, you will be able to slip by all the Imperials' attention, and once they spot you approaching the beacon from such a close distance the combined firepower of the whole Imperial team will not be able to destroy it before it can jump. If you get a TIE bomber or two on your tail, call for fighter backup. They shouldn't have to give away your position unless they bring half the Imperial team with them. TIE fighters can safely be ignored. Lone TIE Fighters pose little threat to a Gallofree transport - apart from the possibility of their pilots reporting your position to the rest of the Imperial team.
A general rule in all stealth-based operations in space combat is that while a gunner can be otherwise useful, a foolish gunner can also be a dead giveaway. If you get a gunner in the gallofree while trying to ride it out of sight that insists on pumping salvoes toward every TIE in sight, thus drawing them to you, do what you can to make him stop. If you can't make him stop, call for fighter escort. You will need it.
If you press the fire button while driving a gallofree transport you will hear a strange humming sound, but see no trace of shots being fired. You have engaged the transport's shield system. Left clicking will engage the transport's dorsal shields, and right clicking will engage the ventral shields. The shields will continue to be active for as long as you keep the button depressed. They will eventually run out of energy, however, and once depleted they cannot recharge, so use them only when it is called for.
Imperial Strategy[]

The four heavy guns on the ISD that shield the transport jump point won't last to a coordinated Rebel team, so don't count on them to stop a Transport rush. It is vital for the Imperials to maintain space superiority using their TIE fighters and Lancer frigate, so that players can use TIE bombers to destroy enemy transports. If they allow the Rebels to get transports close to the ISD without those transports sustaining moderate damage, more often that not, they will break through to escape. Space superiority around the ISD is crucial.
To this end, the Empire has several possible approaches. One is to swarm and shield the transport jump point using all their TIEs and their capital ship. Presumably, the swarm will batter down any approaching transports and destroy incoming fighters, allowing the heavy guns to finish off any approaching transports. While putting all your eggs in one basket can be effective, if the Rebels strike in full force and take down the Lancer, TIE fighter, and heavy cannons; they may have several transports lined up to take advantage of the massive gap in Imperial defenses before it can be filled up again.
The other is to take the fight directly to the Rebels and hit their fleet with fighters and bombers. Since transports cannot heal themselves, this can lend to them being heavily damaged by the time they reach the ISD, making them easy targets for TIE bombers that can quickly attack them. Be wary, though, of stealthy transport teams that will cut around the furball and try and reach the jump point from an obtuse angle. Keep communicating with your teammates, and you will prevent any transports from sneaking by.
Whether you're flying a TIE fighter or bomber, remember that the ISD's turbolasers and ion cannons are quite effective against fighters. If you've got a nasty little Rebel tailing you, skim across the top of the ISD and force them to brave its guns. Even if the guns don't kill the pursuing Rebel, they may be forced to break off, allowing you to disengage freely or vector on to their tail.
When you're in a Bomber, always fly at full throttle and make attack runs on transports, as opposed to slowing up on their tail. If you're flying as part of a squad (and they're flying bombers too), try and organize yourself into a formation or certain striking manuever. With two bombers, you can use a bracket attack (at x distance from target, one breaks left, one breaks right, and then both turn in to attack). Keeping spread out and efficient in attack runs can overwhelm transport gunners and shield operators.

With this particular TIE bomber variant, the Proton bombs have two different firing modes, toggled by pressing the 'F' key. The default mode sends the bombs flying out in front of you, like lasers or torpedoes. Alternately, you can launch the bombs downward through your ordnance chute, akin to free-falling bomb trajectories. While you won't land as many blows with the falling-bomb mode, it can be useful to ensure survivability, since you don't have to fly directly at the transport or corvette. It takes about eighty direct hits with proton bombs to kill a transport at full health.
TIE fighter hotshot? Forget about trying to pick up a transport kill and kill fighters instead. If your ISD's main guns and Lancer frigate escort are still rolling, prioritize Y-wings and their deadly torpedo arsenal; be wary of their turret, however, it can both laser you and disable you. If those particular transport killers are down, start protecting TIE Bombers and mixing it up with X-wings. Emphasis on protecting your TIE bombers. They're heavily armored and maneuverable enough to elude a Gallofree transport's lasers, but if an X-wing gets on their tail, their proton explosives will be lost with the bomber.
Also, if you can master it, it is possible to park your craft inside the ISD's main TIE bay. This can be useful if members of your team have any interest in repairing your craft, but no method exists for rearming bombs. Loosely translated, unless you're a hotshot pilot, you won't have the opportunity to do this often. Just don't park where a TIE will normally spawn. Aim for between the extended prongs, and make sure to keep your throttle down. Once you've come to a stop, flip and rotate 180 degrees. Then call for repairs.
If you're driving the Lancer Frigate, remember that you have no way of recovering damage; there's no supply transport. Pilot it conservatively, keeping it close to the ISD and the Jump point. Used properly and protected well, it will vaporize predatory fighters in a hurry and give the Imperials an edge.
Lastly, if a transport gets within 1000 meters of the Hyper point and they're not heavily damaged, let the bastards go and pick another transport to frag. The ISD guns will either get them or won't.
Gameplay Notes[]
- The Rebels should note that all Gallofree Medium Transports have shields on their transports. Left-clicking engages the dorsal shields, while right-clicking engages the ventral shields.
- The Rebels can destroy the Star Destroyer's eight heavy lasers and the multiple smaller cannons located on its hull. While there have been recorded instances of transports sneaking past the ship's guns, destroying them is nearly vital to the survival of the transports.
- As of Patch 1.1, the hyperspace jump point's radius has been doubled.
- Important: The location of capital ships, freighters, nearby fighters, and your mission objective are all marked on your 3D map. You should enable the 3D map (default key ALT) in space maps or risk disorientation.