| Endor Strike Team | |
| |
| Map Information | |
| Factions | Rebel Alliance VS. Galactic Empire |
| Type | Rebel Assault |
| Size | 16, 32, 64 |
| Briefing | "While the battle for Endor rages above, the fight for the shield generator has taken a turn for the worse. Faced with a legion of crack Stormtroopers guarding the shield generator, Rebel Alliance Commanders have dispatched additional commandos in an attempt to secure the ground and buy time for the bunker to be destroyed. It is now a race against the clock for the Alliance to eliminate the entire Imperial presence on the forest moon of Endor before the fleet above is annihilated." |
| [Source] | |
Endor Strike Team, a Push Mode: Rebel Assault map, is an infantry combat map set in the forests of Endor's Sanctuary Moon. Only Rebels may capture control points in this map - Imperials can only defend them until they fall.
| Alliance Vehicles | Imperial Vehicles |
|---|---|
| 74-Z Speeder Bikes | Probe Droid |
| 74-Z Speeder Bike | |
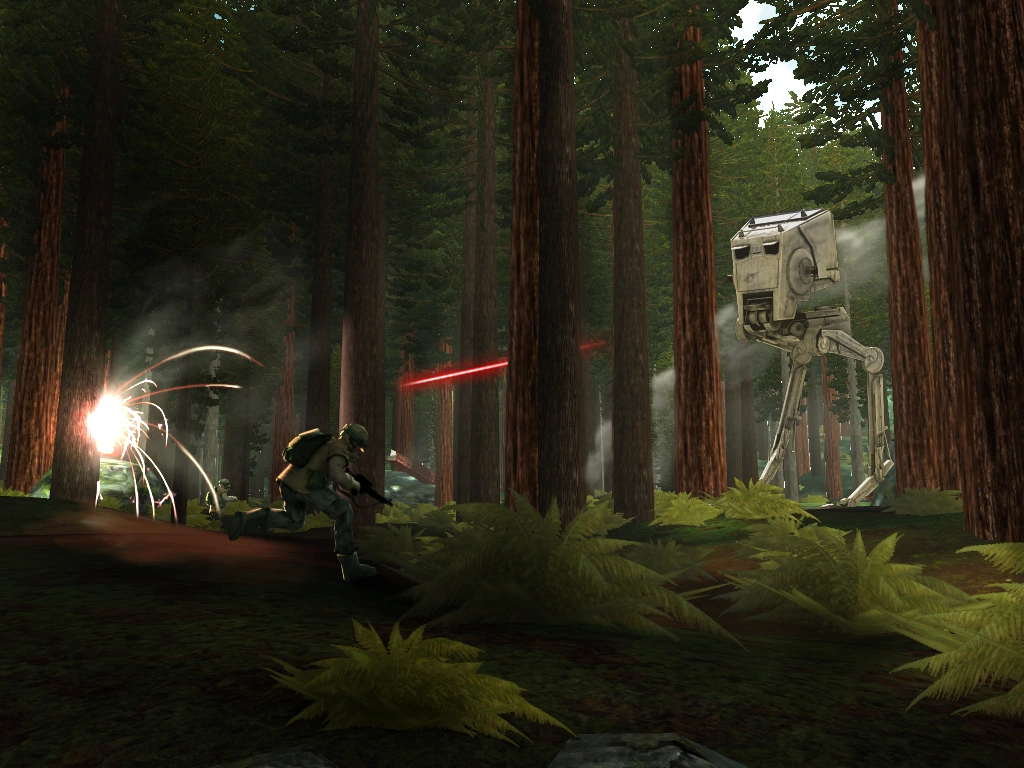
| AT-ST | |
| Laser Turrets | |
| Classes: Trooper, Heavy Weapons Specialist, Support, Medic and Officer. | |
| [Source] | |
Suggested Strategy[]
Alliance[]
As the Imperials cannot recapture any outposts taken by the Rebels, it is best that the Rebels spawn up quickly and capture the Scout Camp before the Imperials can establish a strong base there. If the Imperials manage to create a resistance at the outpost, then the Rebels should have some people bypass it and attempt to capture the Ewok Village. Like the Slave Quarters in Mos Espa, this control point is often neglected by its defenders. Once the village is captured, have people with snipers spawn up and pick off any Imperials they see.
After the Scout Camp has been captured, the Rebels should have as many people ride speeders (with a gunner) and head off to capture the Imperial Base. With the Imperial Base Camp out of the way, the Imperials will have very little immediate speeder support, and then the Rebels can continue to capture any bases remaining. Collect as many other speeders as you can, and get ready to strike the Bunker Entrance.
The bunker entrance outpost is the hardest to capture (next to the Imperial base) as by that time a smart Imperial team will have set up Officer machine guns and have hidden snipers in the region. Also, the outpost is the closest to the AT-ST spawn, so expect a walker there. The best way to achieve victory here is to gather up enough soldiers and attack the Bunker Entrance in groups of 3 or more. It's not a bad idea to have snipers as well. Also, have one or two speeders circle the outpost and capture it.
Once the bunker entrance outpost is captured, the Rebels basically won, just capture any other remaining outposts and eliminate any other Imperial troops. Beware, Endor has many static objects, so it's easy for a lone Imperial soldier to delay the inevitable loss and hide behind a tree, so scout out the region with speeders and snipers and remember, the Ewok Tree Camp is the best area to scout with binoculars or a sniper.
Empire[]

Turbo laser tower defending the outpost.
Have everybody spawn up at the Scout Camp. Don't forget to have a sniper or two at the Ewok Tree Tops outpost, as snipers at that outpost are very effective. Have two soldiers spawn up near the AT-ST, and have one of them drive it and have the other be the gunner. For the AT-ST driver, be sure to carefully drive it, because the AT-ST tends to lose a lot of health while climbing at steep angles. Try to find a smooth surface and try to stay away from statics and hills.
For the ground troops at Scout Camp and the Ewok outpost, don't try to rush the Rebel Insertion outpost. You can't capture any outposts, and you have to try to prevent any rebels from passing those two outposts. Have lots of snipers and troopers defending these outposts. Try to set up a defensive line that blocks any Rebels from passing it. Hold the Scout Camp long enough for the AT-ST to arrive, which should be about 3-5 minutes. After that, protect the AT-ST and stop the Rebels from advancing. If you should fail, and Scout Camp and Ewok Camp become under Rebel control, you should retreat to the Imperial Outpost. Set up Officer machine guns and use the speeders to halt the rebel advance. The officer kit's tracking unit is key to defending this outpost. If even one Rebel neutralizes the outpost, the Imperials lost one of their key outposts.
If the Imperial Base collapses, you have to retreat to the Bunker Entrance outpost. Set up machine guns, snipers, and most importantly get an AT-ST to the outpost, and fast. No doubt as soon as the Imperial base is capped by a Rebel speeders will attack the two remaining outposts. Try to defend the Bunker Entrance as best as possible. Focus all your defense in keeping that outpost safe. Try to push the Rebels back by hampering at the Imperial Base flag. Do whatever you can to eliminate the Rebel attack and with good determination and enough ammo wasted the Imperials should be able to successfully defend the flag.
Gameplay notes[]
- Contrary to what the map implies, it is possible to capture the Ewok Village before the Scout Camp. Imperials should guard both sites.
- Imperials can not capture control points.
- Inside the Imperial Outpost there's a small building with a blue force field covering the door. Walk over to it and hit your Enter Vehicle key to activate the probe droid.
- As of version 1.2, the Imperial Outpost is guarded by laser turrets. To make use of them, walk up to the consoles at the bases and hit the Enter Vehicle (def. E) key.
- Other version 1.2 changes include changes to the Tree Village to make it easier to capture by the Alliance, and the fixing of the blocked spawn point at the bunker.